Move-In and Move-Out Inspection Checklist
Room-by-room condition checklist with move-in and move-out columns side by side, a photo log and signature lines.
- PDF · Letter
- Word
Free · PDF + Word
What this is for
Most security deposit arguments come down to one question: was that stain there when the tenant moved in? Without a record, it is your memory against theirs, a year or three later, and nobody remembers carpet that well. A move-in and move-out inspection checklist answers the question before it is asked. You walk the unit with the tenant on day one, write down the condition of every item, take numbered photos, and both of you sign. At move-out you walk it again on the same sheet.
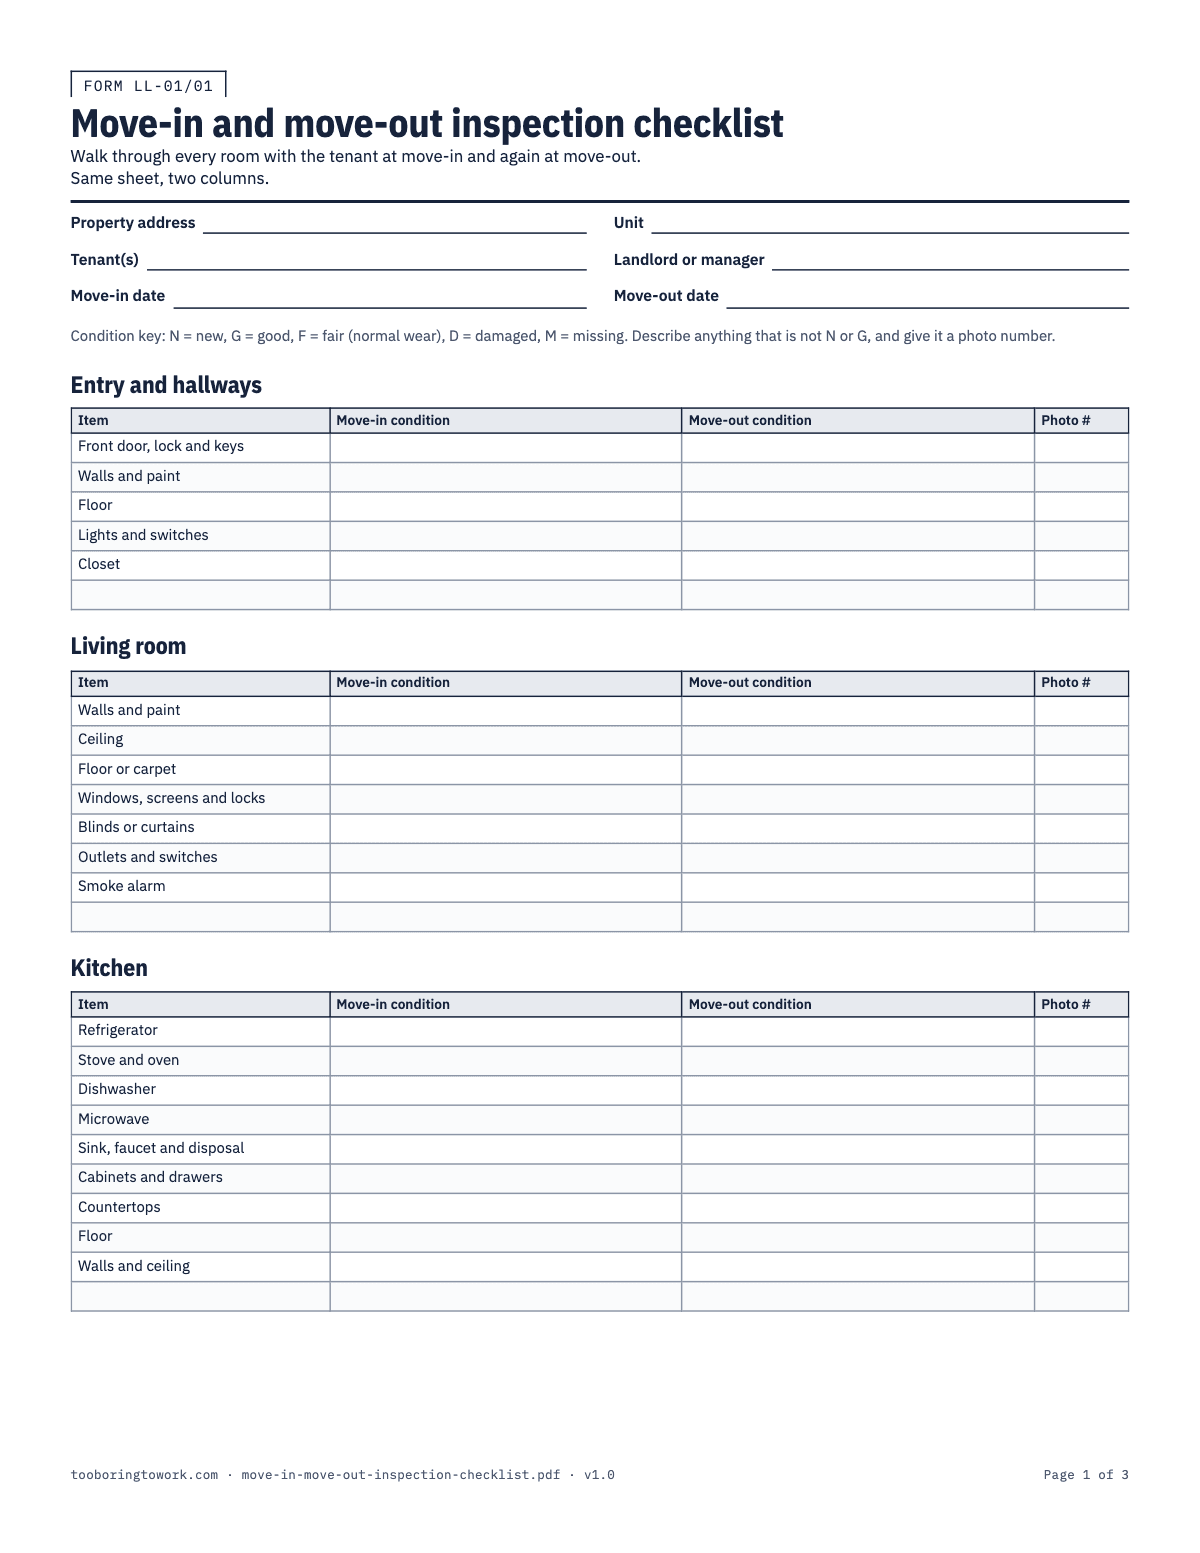
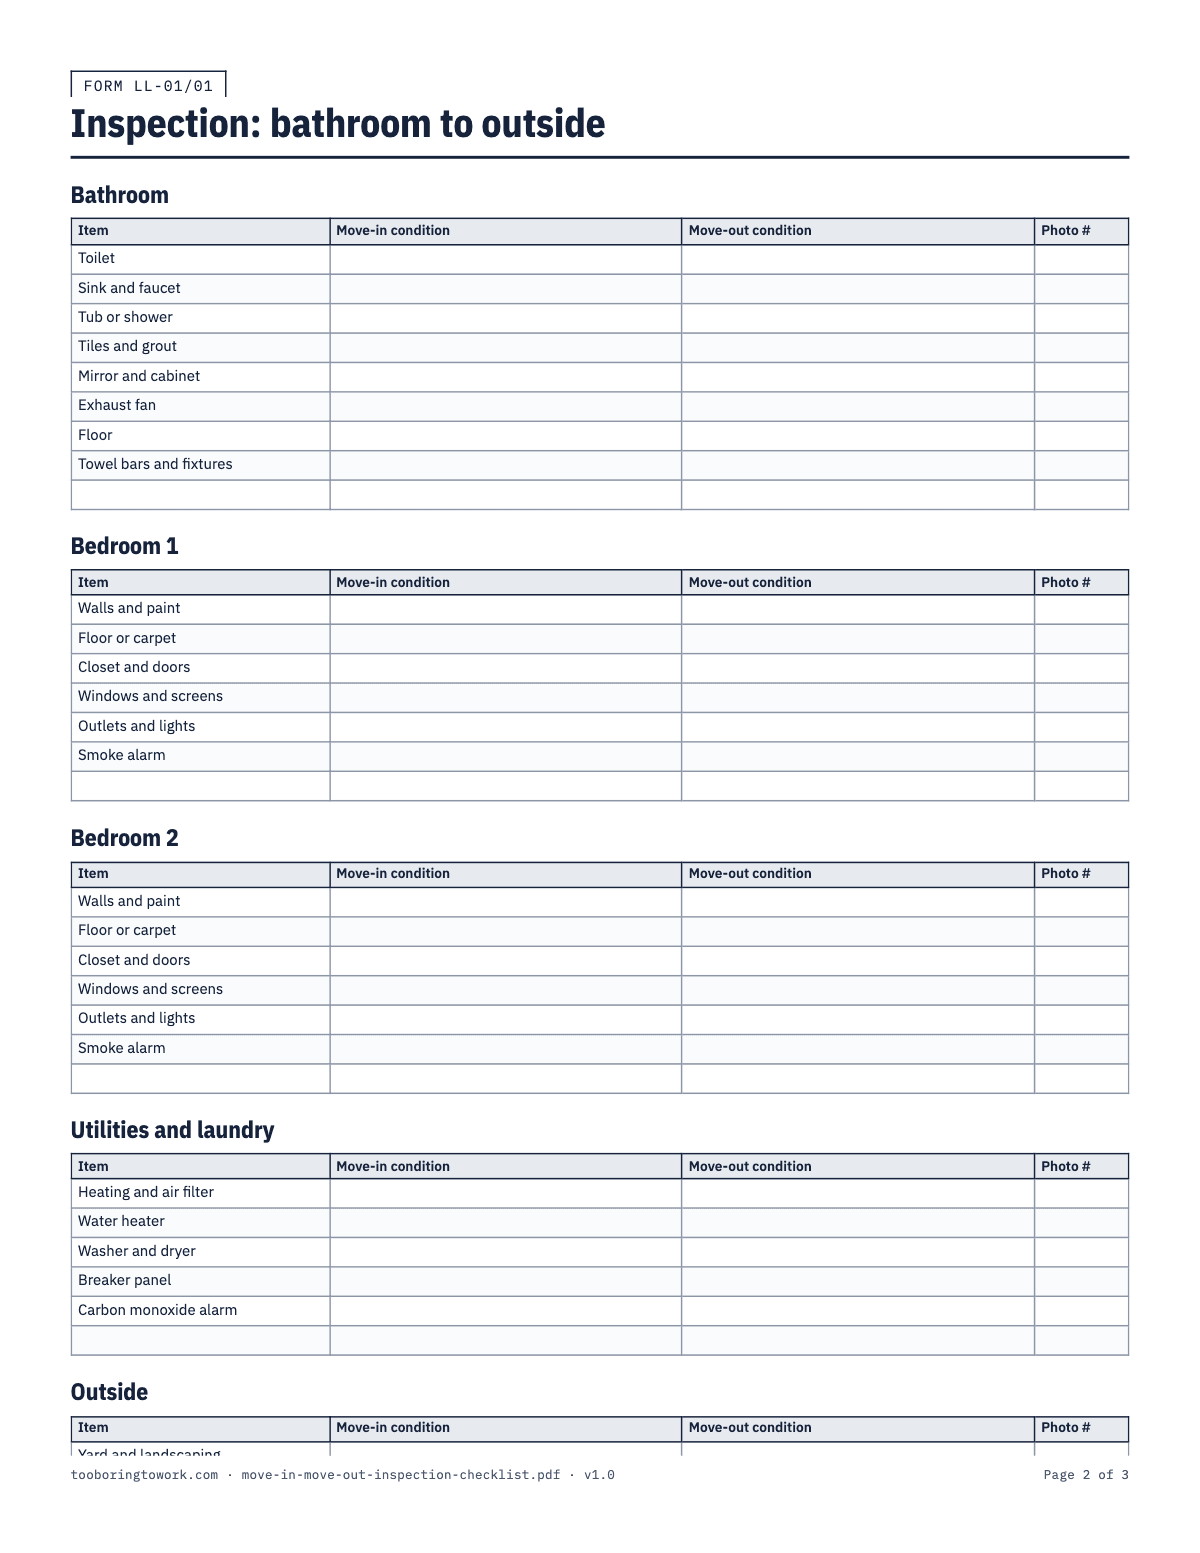
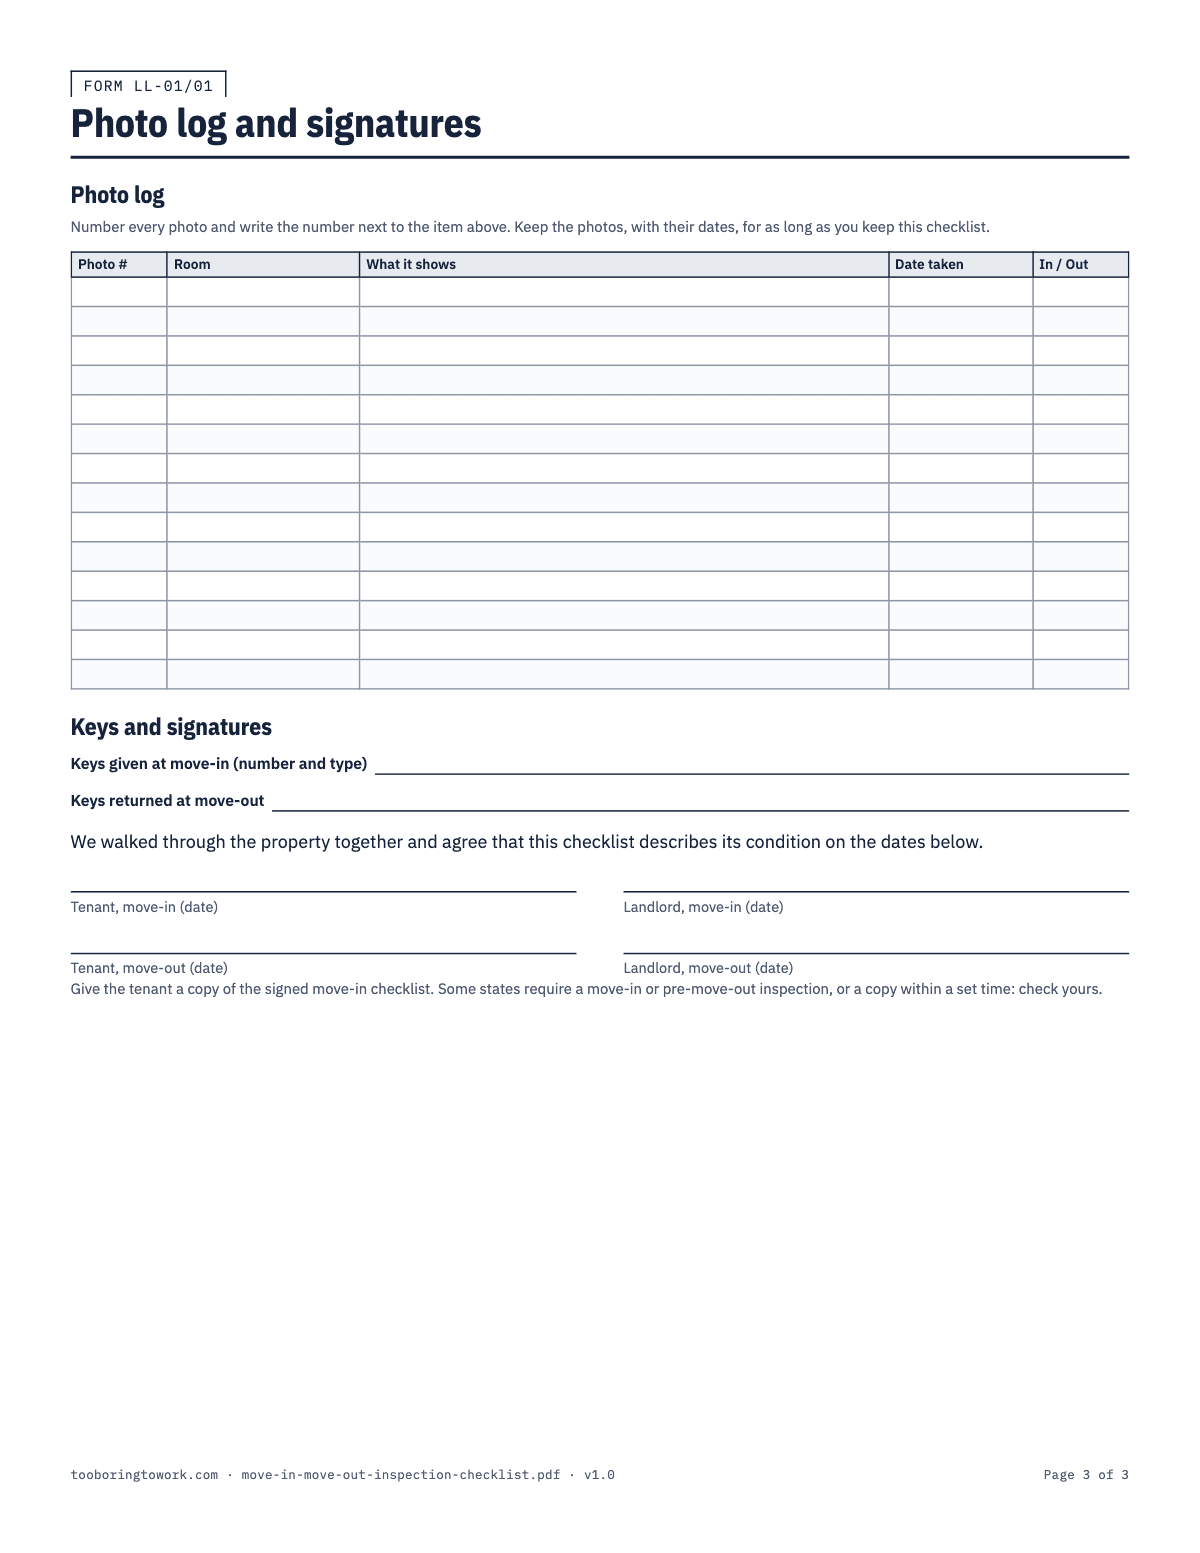
The checklist has the two inspections side by side. Every room gets its own table with four columns: Item, Move-in condition, Move-out condition and Photo #. The rooms are the entry and hallways, living room, kitchen, bathroom, two bedrooms, utilities and laundry, and outside, each with the items that usually cause disputes already listed (smoke alarm, stove and oven, tiles and grout, blinds, breaker panel, trash bins) and a blank row for anything else. A condition key keeps the entries short: N for new, G for good, F for fair or normal wear, D for damaged, M for missing. The last page is a photo log, a keys section and four signature lines.
It comes as a printable Letter-size PDF for a clipboard walkthrough and as an editable Word document. Use the Word file if your unit has a third bedroom, a basement or a deck: add a room, delete the second bedroom, rename items to match what is actually there, then print. The layout and columns stay the same, so the move-out walkthrough still lines up with the move-in one.
How to fill it in
- Fill in the header before you start: property address, unit, tenant names, landlord or manager, and the move-in date. Leave the move-out date blank; it gets filled in at the end of the tenancy, on this same sheet.
- Walk the unit with the tenant, room by room, in the order the sheet is printed. For each item, write a letter from the condition key in the Move-in condition column. Anything that is not N or G gets a few words of description: "scratch 4 in. long left of window", not just "scratched".
- Take a photo of every item you marked F, D or M, and a wide shot of each room. Give each photo a number, and write that number in the Photo # column next to the item.
- On the photo log page, list each photo: Photo #, Room, What it shows, Date taken, and In or Out. Keep the photo files named or sorted by the same numbers, with their dates, so photo 14 on paper is photo 14 on your phone.
- Count the keys and write the number and type in "Keys given at move-in": two front door keys, one mailbox key, one garage remote.
- Both of you sign and date the move-in lines. Give the tenant a copy of the signed checklist the same day, and keep the original with the lease. Some states require a move-in inspection, a pre-move-out inspection, or a copy within a set time, so check your state and local rules.
- At move-out, walk the unit again with the same sheet and fill in the Move-out condition column next to each move-in entry. Photograph anything that changed, add those photos to the log marked Out, and record the keys returned.
- Sign the move-out lines, ideally together. If the tenant is not there, note that on the sheet, and do the walkthrough anyway with photos. Then take the sheet to the security deposit deduction sheet, where each deduction points back to an item and photo number here.
A filled-in example
| Item | Move-in condition | Move-out condition | Photo # |
|---|---|---|---|
| Refrigerator | G | G | 7 |
| Stove and oven | G, all four burners work | D: front left burner does not heat, knob cracked | 8, 41 |
| Sink, faucet and disposal | F: faucet drips slightly | F: same drip, no change | 9 |
| Cabinets and drawers | G | F: light scuffs on lower doors | 10, 42 |
| Countertops | N | D: knife cut 3 in. near sink | 11, 43 |
Common mistakes
- Writing "fine" or "OK" for a whole room. At move-out, "fine" can mean anything. One letter per item, with a note for anything less than good, is not much slower and holds up much better.
- Taking photos that cannot be matched to anything. A camera roll of 80 unlabeled pictures proves very little. A photo number on the sheet, the same number in the photo log, and a date is what makes a picture evidence.
- Skipping the move-in walkthrough because the unit was just renovated. New paint and new carpet are exactly what you will want to point to later. Mark them N and photograph them.
- Doing the move-in inspection alone and never giving the tenant a copy. A checklist the tenant never saw or signed is easy for them to dispute. Walk it together, sign it together, hand over a copy.
- Using a fresh form at move-out. The point of this sheet is that move-in and move-out sit next to each other on the same line. A new form means comparing two documents that never quite match.
Questions
- What should a move-in inspection checklist include?
- Every room, every fixture and appliance, the condition of each at move-in, photos with numbers, the keys handed over, and signatures from both landlord and tenant. This one also has the move-out column next to each item, so the same sheet covers the end of the tenancy.
- Does the tenant have to sign the move-in checklist?
- It is strongly worth getting their signature, because it shows they saw and agreed with what was written. If a tenant disagrees with an entry, write their comment next to it and have them sign anyway. Whether a signed checklist is required depends on your state, so check your state and local rules.
- What is normal wear and tear versus damage?
- Generally, wear and tear is what happens from ordinary living: light scuffs, slightly faded paint, carpet flattened in walkways. Damage is beyond that: holes, burns, broken fixtures, pet stains. The F rating on this sheet is for normal wear. Your state law decides what you may deduct for, so check it before charging for anything marked F.
- How long should I keep the inspection checklist and photos?
- At least until the deposit is settled and any dispute is over, and many landlords keep them for several years after the tenancy ends. Keep the photos with the checklist; the checklist tells you which photo matters and the photo proves the checklist.
- Can I use the Word version instead of printing the PDF?
- Yes. The Word file has the same rooms, columns and signature lines, and you can add or remove rooms and items to match your unit. Many landlords edit it once per property, save a copy, and print that copy for every new tenant.
- What if the tenant will not do the move-out walkthrough?
- Do it yourself, soon after they return the keys, and fill in the Move-out condition column with extra photos. Write on the sheet that the tenant was invited and did not attend, with the date. Check your state and local rules, since some states require you to offer an inspection before the tenant leaves.